Sunday, August 14, 2011

Super Funky Beets!

First, I have to give major props to the Farm 2 Family Market for hooking me up with a fabulous box of beets at a super price this week! I had asked for half a bushel, but they weren't able to get me that much, and we were all sad, but this was The Universe working in my favor. For real, I could NOT have processed one more beet this weekend. I'm all beeted out. And totally thrilled that I have SO MANY jars of magically delicious pickled beets to show for it! But I really was remiss. I should have taken a picture of the box of beets. It seemed small at first, but each time I looked at it, it was bigger. By Saturday morning, that box was HUGE and I was worried I wasn't going to be able to get them done. I had to do them in two batches, mainly because I don't have a pot big enough to boil 10+ pounds of beets at a time, and my canner only holds 8 pint jars.

So, to begin: scrub your beets, but leave the tops and rootlets on.


Side note: I was very excited to find some itty bitty beets in the bottom of the box. Enough for one jar of whole mini beets, which I'll serve at Thanksgiving. Yay!!


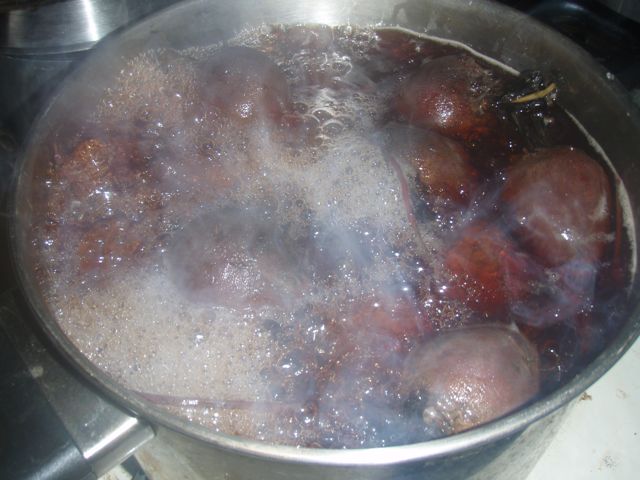
Then you boil them for a bit. Between 10 and 30 minutes, depending on the size. The goal is to cook them just enough so you can slip the skins off after cooling them.


 To cool them (just like peeling peaches) ICE BATH!:


Batch One I totally didn't boil long enough, so it was out with the trusty ceramic peeler again. I really prefer the aesthetics of the skin-slipped beet over the peeler-peeled beet, so I made a note to add 10 minutes to the second batch's boiling time. Not that anyone who opens a jar of these beets and eats them will notice whether they were peeled with a peeler (except maybe the State Fair judges. Yes, I'm getting a little obsessed...) but I'll know. Of course, the peeler takes about 10 seconds per beet, while slipping the skin can be a long and messy process. But, like making good watermelon rind pickles, the time spent is worth it, in my opinion.

After the beets are peeled and the pickling brine is made (secret recipe! email me and I'll give it to you! so not quite secret, I guess....) and your jars and lids are sterilized, slice up your beets into 1/4 slices. You could get one of those fancy wavy slicers. I almost did, but resisted. One of my simplest pleasures in life, something that makes me happy beyond words is beet grain. Like the circles of an old tree, I love the circles in a sliced beet. Joy!


I packed my jars nice and tight, plus my one jar of whole mini beets.


Process per your tested recipe guidelines (my recipe called for 30 minutes in a boiling water bath). Then, ta da!! You have wonderfully canned, beautiful pickled beets!


Total of both days combined: 14 glorious pints! Yay!!! One pint to submit to the State Fair competition. One jar for the Farm 2 Family market in gratitude (also, Suzi gave me a great tip for getting JillPickles on the road to certification. Someday in not too distant future, you guys will be able to actually BUY MY PICKLES! Thanks, Suzi! You're a doll! For you, extra pickles!) 2 jars for the Mendelsons (what can I say, I make my pickles for the people I love the most.) And the rest are all for me! Ha ha ha! None for anyone else! YUM!

Monday, August 8, 2011

The Most Fabulous Watermelon Rind Pickles Ever

I sure am lucky to have such a selective memory, because I always seem to forget how much work watermelon rind pickles are. I only ever remember how much I love them. So when I found out there is actually a category in the State Fair pickle competition specifically for watermelon rinds, I knew that I had to submit mine. Once I win my blue ribbon, I'll gladly share my recipe with you all. It's based on one in the Joy of Pickling book, with some spice alterations of my own that I came up with after experimenting all last summer. I really think this batch I've just finished is really going to knock your socks off!

To begin:

Ask your favorite farmers how thick their watermelons' rinds are. Or if they are growing heirloom watermelons. Heirlooms tend to have thicker rinds. Seedless tend to have thinner rinds. Know your farmers, ask them about their produce. How I found my fabulously thick-rinded melons this year? I asked one farmer if his watermelons had nice thick rinds because I was going to be pickling them, and he said no, but said that that farmer over there, with the red awning, had super thick-rinded ones. How cool is that? So I got:


And scrubbed them good. These were small melons. Smaller than I would have liked. Like tetherball size.

See how nice and thick the rind was?


Commence watermelon deconstruction.


So, yeah, that took about 2 hours. You really have to get every bit of pink off. Lucky for me that cute paring knife is super sharp, and my fantastic ceramic peeler is killer on the tough rind. Also, I had total prune hands when I was done. Watermelons really are all water!

So then, because I'm a big nerd and I really want to win, I took teeny cookie (well, the label said they were for aspic but the thought of aspic makes me shudder...) cutters to about 1/3 of the rinds. These will be specifically for the pickles I submit to the state fair competition. The Victorians used to cut their watermelon rind pickles into fancy shapes, so that's what I'm doing for mine! Of course, that added another couple of hours to the rind prep...


Hearts and moons and stars... and clovers! I expected some kids to chase a Leprechaun through my living room. Then 1/3 of the batch is scraps from the cut-outs, and the last 1/3 is just squares. So after 5 hours of peeling and trimming rinds, into my brining solution they went until the next day...

The brine:


Sunday was rinse and boil day! How exciting! After brining overnight and rinsing thoroughly to get all the salt out, it was time for a brief simmer. I love the results of this phase... so pretty!


Then it's time for the final soak in the pickling liquid. I prepare my dry ingredients....


I'm not telling what's in those spice bags right now... you get the general idea. The general, delicious idea!! Combine those with the vinegar (I'm not saying what type or types I used! This is my blue ribbon recipe here!) and sugar, bring it to a boil, toss in your rind, and then soak it overnight again.

Note that not all recipes are this long and drawn-out.... but I tried out a bunch of different methods last summer and this one was so much better than all the others I really think it's worth the time. If you find a recipe that's shorter and you love it, that's awesome! You make whatever pickles you like the best!

So now it's Monday night and I've just finally pulled my last batch of half-pints out of the canner... Phase III was simply bring the rind up to a simmer in the pickling liquid, simmer until it was translucent, then can it. 


I ended up with 13 half pints! 4 short fancy jars of square-cut rinds, 4 jars of fancy shapes (I'll pick the best to submit for competition, the others will be special gifts or special occasions... Mendelson Brunch, I'm looking at you!) and 5 jars of scrap shapes... those will be gifts for my creative friends! Like looking at clouds... they can find ones that look like a dinosaur riding a bicycle! Or a clown shooting a bow and arrow! Oh, it'll be ever so fun!


The end. Wish me luck at the State Fair! And come with me on October 9th to watch the demolition derby!